Appearance
Finding your way around
Every screen in CNV Connect uses the same frame: a top bar, a module rail on the far left, a sub-menu for the module you are in, and the working area. Learn the frame once and every page in this guide becomes predictable.
Address https://hub.cnvconnect.com
Applies to every page after you sign in
The application frame
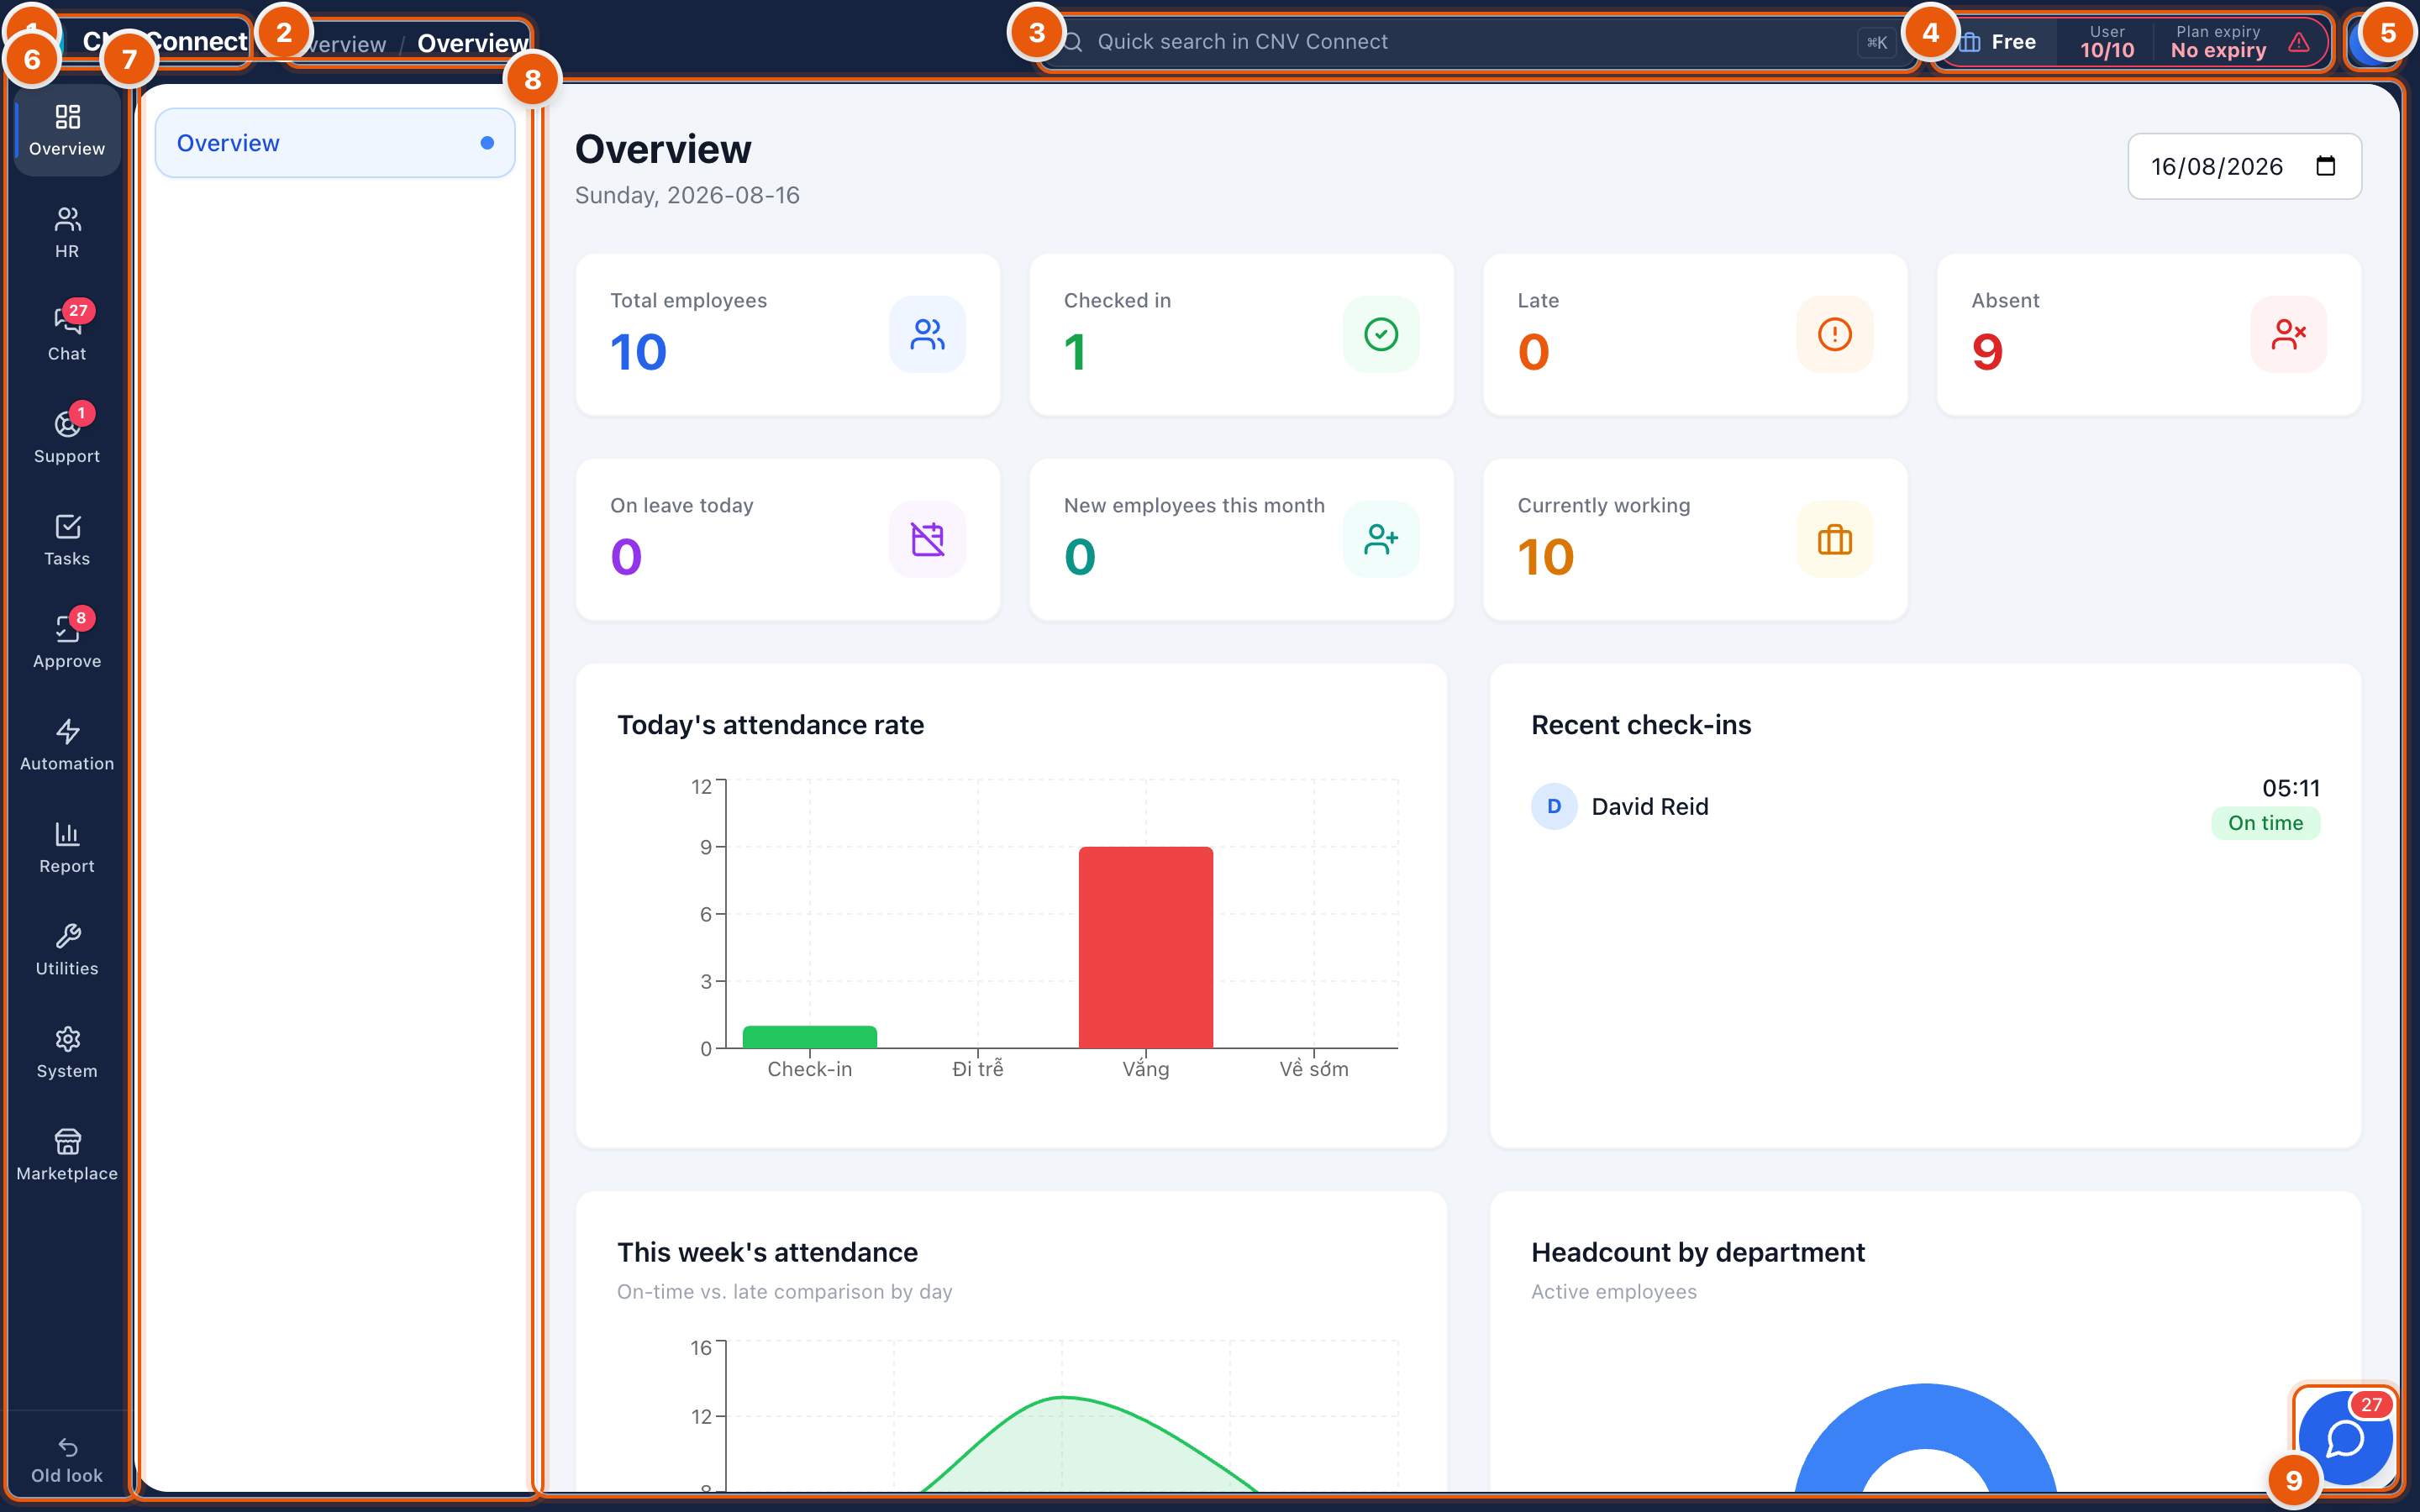
- Workspace brand — the logo and name of your workspace. Selecting it returns you to the Overview dashboard. Administrators can replace the logo in General settings.
- Breadcrumb — module › page. It always tells you where the current screen sits in the menu.
- Quick search — type anything to jump to a page, a person, a ticket or a task. The keyboard shortcut is ⌘K on macOS and Ctrl+K on Windows and Linux.
- Plan chip — your subscription tier, how many seats are in use and when the plan expires. Selecting it opens Plan and billing. It turns amber when seats are nearly exhausted or the plan is about to end.
- Your avatar — opens your personal menu: profile, language, personal settings and Sign out.
- Module rail — one icon per module. Red badges count things waiting for you: unread chat messages, tickets, approvals and tasks.
- Module sub-menu — the pages inside the selected module, grouped by heading (for example Contract, Attendance, Leave, Assets inside HR).
- Working area — the page itself. Every page starts with its title, then the actions on the right, then filters, then the data.
- Chat dock — a floating button that opens team chat over whatever you are doing, so you can answer a colleague without losing your place.
Quick search (⌘K)
Press ⌘K / Ctrl+K anywhere except inside team chat. Start typing and the palette lists matching pages and records; use the arrow keys and Enter to jump. It is the fastest way to reach a page that is buried three clicks deep in a sub-menu.
Reading any list page
Almost every page in CNV Connect is a list, and they all work the same way:
| Area | Behaviour |
|---|---|
| Title row | Page name plus a count of what is in the list |
| Buttons, top-right | The create action is always the rightmost, filled-blue button |
| Search box | Filters as you type, on the fields named in its placeholder |
| Tabs / chips | Saved status filters — All, Active, Expired and so on |
| Add filter | Extra conditions (owner, department, date range) stacked as removable chips |
| Table header | Selecting a column heading sorts by it; a second click reverses the order |
| Rows | The blue text in a row is a link into the record. Right-hand icons are per-row actions |
| Footer | Result count and paging |
Menu badges
| Badge | Meaning |
|---|---|
| Number on Chat | Unread messages across all channels and direct messages |
| Number on Support | Tickets assigned to you that are not resolved |
| Number on Approve | Requests waiting for your signature |
| Number on Tasks | Tasks assigned to you that are due or overdue |
| Number on Utilities | Finished exports you have not downloaded yet |
Badges refresh in the background every few minutes and immediately when something is assigned to you.
Two looks
CNV Connect ships two shells. The current one puts the top bar and rail on screen as shown above. The link at the bottom of the rail (Old look) switches to the earlier layout, where the same menu appears as a single sidebar and there is no top bar. Everything else — pages, permissions, data — is identical. Screenshots in this guide use the current look.
If a page is missing from your menu
Two possible reasons:
- Permission. Menus are filtered by what your role may see. See Who can see what.
- Module not switched on. Optional modules such as team chat are enabled per workspace in Marketplace.
Typing the address by hand does not get around either: the workspace bounces you back to the dashboard.